Fran's Projects:

Do It Yourself Digital Fireflies
A fun project coded in Arduino for the ATmega328 Microcontroller
(December 2012)


This was a simple little project that was really just an excuse for me to learn Arduino.  I bought some really attractive Ball canning jars at the market and thought that it would be really cool to use them to make some kind of bedside firefly jar.  I thought that I would use an array of RC transistor timers to drive some vintage 70's amber lens LEDs I had in stock.  But I wanted these virtual fireflies to act like the real thing, and I soon realized that there would have to be 4 separate operations to depict a realistic firefly blink, with a quick fade-on period, a brief stay-on period, a slower fade-off period, and a long off-rest period.  Visualizing the large array of discrete RC timers I would need to create several fireflies was going to be prohibitively complex to shove into a jar lid, so I thought that this would be a really good job for a microcontroller. 
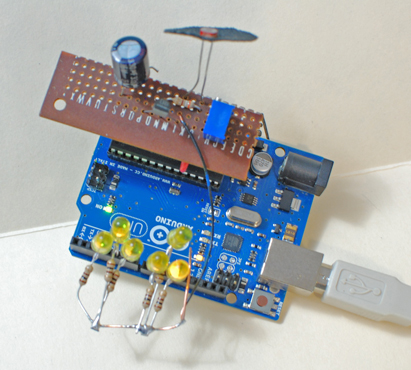
Proto-typin'!

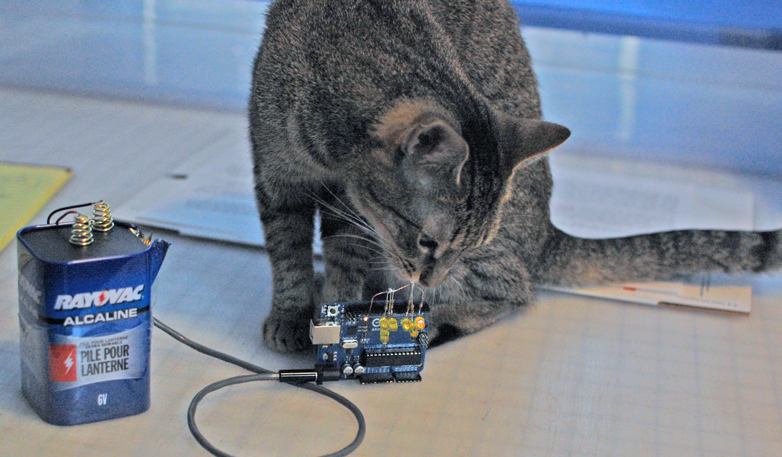
I got an Arduino UNO R3 board from Adafruit Industries that acts as a USB interface to an ATmega328 microcontroller, and I wrote the code on my PC using the Arduino open-source software.

6 of the 14 ATmega328 I/O pins provide 8-bit pulse width modulated (PWM) output with the 'analogWrite()' function and I wrote the code to create the illusion of 6 firefly tails, giving each of them their own 'personality' through independently varying rates and fluctuations, so that the sequence would be ever changing.  I also wanted my fireflies to respond to the environment, because as we all know the real things would never come out to do their dance before twilight - so I added a photoreactive circuit using a common photo resistor and a 2N3904 transistor to turn on the LEDs only when the ambient light was suitably dimmed. 

This was going to end up being a self-contained autonomous display, so I would prototype it on the UNO board to prove the concept, then I would remove the programmed Atmega328 microcontroller chip and transplant it to my own smaller battery powered board that would contain the completed circuit, which I would build into the bottom of the jar lid. 

I wrote this code as a single continuous loop program with 24 subroutines to independently control the four states (fading on, staying on, fading off, and staying off) of each of the 6 output pins (ledPin function) to drive each LED, and global variables had to be set to keep track of what state each firefly was in and at what point in that state, so that the results could be written to the pin outputs and those variables could also be updated with each cycle of the loop, which constantly changes the write values, creating the illusion of multitasking six independent routines with a single processor.

It is a very simple program and it works satisfyingly well - more satisfying was the fact that I was able to finish this code and have it debugged within just a day or two of beginning to read up on what the heck Arduino was.  It is quite literally that easy to work with.  If you have any coding experience at all in BASIC or C then you will have no problem transposing your coding chops to Arduino.  It's awesome!


Missy checks out her UNO prototyped fireflies....

Here is my digital firefly code, which you can cut and paste into Arduino and upload to your own compatible microcontroller:

----------------------------------------------
 

/* ledPin is a preassigned variable that controls output to the selected pin number. 
  the PWM output pins are 3,5,6,9,10,and 11  */
int ledPin3 = 3;
int ledPin5 = 5;
int ledPin6 = 6;
int ledPin9 = 9;
int ledPin10 = 10;
int ledPin11 = 11;
// fadeValue is a preassigned variable for the dregree of pulse width modulation, from 0 to 255.
int fadeValue3 = 0;
int fadeValue5 = 0;
int fadeValue6 = 0;
int fadeValue9 = 0;
int fadeValue10 = 0;
int fadeValue11 = 0;
/* The updown variables for the PWM and period of each LED can be: 
  0=fadeup, 1=onfulldelay, 2=fadedown, and 3=offfulldelay. 
      You can set any of the pins to begin the sequence at any value from 0-3  */
int updown3 =0;
int updown5 =3;
int updown6 =1;
int updown9 =0;
int updown10 =3;
int updown11 =1;
// onfull variables set the starting on delay time
int onfull3 =0;
int onfull5 =15;
int onfull6 =27;
int onfull9 =11;
int onfull10 =17;
int onfull11 =0;
// offfull variables set the starting off delay time
int offfull3 =0;
int offfull5 =0;
int offfull6 =0;
int offfull9 =5;
int offfull10 =0;
int offfull11 =0;
 

void setup() {
  // Fran Blanche Fading Fireflies / 6 pin PWM LED control
}

void loop() { // Loop Start

// Pin 3 Fade Up Sequence:
  if (updown3 == 0){fadeValue3 <= 250; fadeValue3 +=5; 
    analogWrite (ledPin3, fadeValue3); 
    if (fadeValue3 == 255) updown3=1;
  }
// Pin 3 On Hold Sequence:
  if (updown3 == 1){fadeValue3 = 255; onfull3 +=1;
    analogWrite (ledPin3, fadeValue3); 
    if (onfull3 == 57) {updown3=2; onfull3 = 0;}
  }
// Pin 3 Fade Down Sequence:
  if (updown3 == 2){fadeValue3 >= 5; fadeValue3 -=5;
  analogWrite (ledPin3, fadeValue3);
    if (fadeValue3 == 0) updown3=3;
  }
// Pin 3 Off Hold Sequence
  if (updown3 == 3){fadeValue3 = 0; offfull3 +=1;
    analogWrite (ledPin3, fadeValue3); 
    if (offfull3 == 452) {updown3=0; offfull3 = 0;}
  }

// Pin 5 Fade Up Sequence:
  if (updown5 == 0){fadeValue5 <= 250; fadeValue5 +=5; 
    analogWrite (ledPin5, fadeValue5); 
    if (fadeValue5 == 255) updown5=1;
  }
// Pin 5 On Hold Sequence:
  if (updown5 == 1){fadeValue5 = 255; onfull5 +=1;
    analogWrite (ledPin5, fadeValue5); 
    if (onfull5 == 47) {updown5=2; onfull5 = 0;}
  }
// Pin 5 Fade Down Sequence:
  if (updown5 == 2){fadeValue5 >= 5; fadeValue5 -=5;
  analogWrite (ledPin5, fadeValue5);
    if (fadeValue5 == 0) updown5=3;
  }
// Pin 5 Off Hold Sequence
  if (updown5 == 3){fadeValue5 = 0; offfull5 +=1;
    analogWrite (ledPin5, fadeValue5); 
    if (offfull5 == 503) {updown5=0; offfull5 = 0;}
  }

// Pin 6 Fade Up Sequence:
  if (updown6 == 0){fadeValue6 <= 250; fadeValue6 +=5; 
    analogWrite (ledPin6, fadeValue6); 
    if (fadeValue6 == 255) updown6=1;
  }
// Pin 6 On Hold Sequence:
  if (updown6 == 1){fadeValue6 = 255; onfull6 +=1;
    analogWrite (ledPin6, fadeValue6); 
    if (onfull6 == 53) {updown6=2; onfull6 = 0;}
  }
// Pin 6 Fade Down Sequence:
  if (updown6 == 2){fadeValue6 >= 5; fadeValue6 -=5;
  analogWrite (ledPin6, fadeValue6);
    if (fadeValue6 == 0) updown6=3;
  }
// Pin 6 Off Hold Sequence
  if (updown6 == 3){fadeValue6 = 0; offfull6 +=1;
    analogWrite (ledPin6, fadeValue6); 
    if (offfull6 == 503) {updown6=0; offfull6 = 0;}
  }

// Pin 9 Fade Up Sequence:
  if (updown9 == 0){fadeValue9 <= 250; fadeValue9 +=5; 
    analogWrite (ledPin9, fadeValue9); 
    if (fadeValue9 == 255) updown9=1;
  }
// Pin 9 On Hold Sequence:
  if (updown9 == 1){fadeValue9 = 255; onfull9 +=1;
    analogWrite (ledPin9, fadeValue9); 
    if (onfull9 == 61) {updown9=2; onfull9 = 0;}
  }
// Pin 9 Fade Down Sequence:
  if (updown9 == 2){fadeValue9 >= 5; fadeValue9 -=5;
  analogWrite (ledPin9, fadeValue9);
    if (fadeValue9 == 0) updown9=3;
  }
// Pin 9 Off Hold Sequence
  if (updown9 == 3){fadeValue9 = 0; offfull9 +=1;
    analogWrite (ledPin9, fadeValue9); 
    if (offfull9 == 443) {updown9=0; offfull9 = 0;}
  }

// Pin 10 Fade Up Sequence:
  if (updown10 == 0){fadeValue10 <= 250; fadeValue10 +=5; 
    analogWrite (ledPin10, fadeValue10); 
    if (fadeValue10 == 255) updown10=1;
  }
// Pin 10 On Hold Sequence:
  if (updown10 == 1){fadeValue10 = 255; onfull10 +=1;
    analogWrite (ledPin10, fadeValue10); 
    if (onfull10 == 59) {updown10=2; onfull10 = 0;}
  }
// Pin 10 Fade Down Sequence:
  if (updown10 == 2){fadeValue10 >= 5; fadeValue10 -=5;
  analogWrite (ledPin10, fadeValue10);
    if (fadeValue10 == 0) updown10=3;
  }
// Pin 10 Off Hold Sequence
  if (updown10 == 3){fadeValue10 = 0; offfull10 +=1;
    analogWrite (ledPin10, fadeValue10); 
    if (offfull10 == 452) {updown10=0; offfull10 = 0;}
  }

// Pin 11 Fade Up Sequence:
  if (updown11 == 0){fadeValue11 <= 250; fadeValue11 +=5; 
    analogWrite (ledPin11, fadeValue11); 
    if (fadeValue11 == 255) updown11=1;
  }
// Pin 11 On Hold Sequence:
  if (updown11 == 1){fadeValue11 = 255; onfull11 +=1;
    analogWrite (ledPin11, fadeValue11); 
    if (onfull11 == 34) {updown11=2; onfull11 = 0;}
  }
// Pin 11 Fade Down Sequence:
  if (updown11 == 2){fadeValue11 >= 5; fadeValue11 -=5;
  analogWrite (ledPin11, fadeValue11);
    if (fadeValue11 == 0) updown11=3;
  }
// Pin 11 Off Hold Sequence
  if (updown11 == 3){fadeValue11 = 0; offfull11 +=1;
    analogWrite (ledPin11, fadeValue11); 
    if (offfull11 == 441) {updown11=0; offfull11 = 0;}
  }
 

// Loop End 
delay (10);
}
 

------------------------------------------------

This program can be condensed a great deal, but I have laid it out so that it is easy to understand and you can see what is going on.  I encourage anyone to hack my code and make it their own.  Change around the variables and make the fireflies behave however you want - make red devil fireflies - or screaming white ones - it is all up to you.  They are after all YOUR fireflies!


It Is A-Liiiive!  Transplanting the programmed ATmega328P from the UNO to my dedicated board.
Ignore the diode on the left - there was just too much voltage drop with the AAA batteries so I bypassed the V+ input protection that I had originally intended.

Beware of Static - the killer of CMOS!  I have a ground lead on my workstation that goes straight to the cold water pipe, and you need one too.  Make sure that your body is well grounded while attempting to dislodge the ATmega328 from its comfortable and safe home on the Arduino board.  To handle CMOS is to be well grounded.  A good life philosophy.

  The photoresistor and 2N3904 transistor will turn on the LEDs when light levels are dimmed sufficiently, and they will be turned off when ambient light gets bright.  R9 is a trim pot, which you need to set the light sensitivity.  I decided for size reasons to use 3-AAA lithium batteries for power at 4.5VDC.  The output pin numbers of the ATmega328 are different than those on the UNO board, so I have noted both on the schematic.  One tip too is that if you decide to add the photoreactive circuit then it is necessary to put some kind of light shield around the photoresistor to prevent the light from the LEDs from feeding back and shutting down the display, as this will cause a rapid flicker.  The R10 10K pull up resistor will prevent the microcontroller from resetting itself during operation.  And even though I used a generic perf board and was not going to be using this chip for data or any other kind of high frequency I/O I still put a ground plane under the socket and around the clock crystal - just cause.

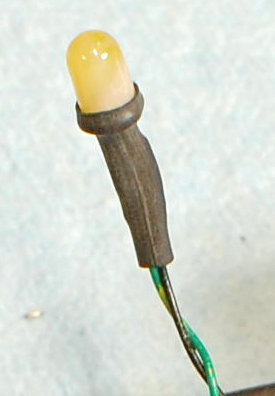
For esthetics I also enhanced the appearance of the LEDs by putting on a few thin coats of semi-opaque pearlescent nail polish.  This really diffused the light from the clear amber lenses and gave the fireflies a realistic look in the final display.

Here is the schematic for the final dedicated board for the programmed ATmega328:


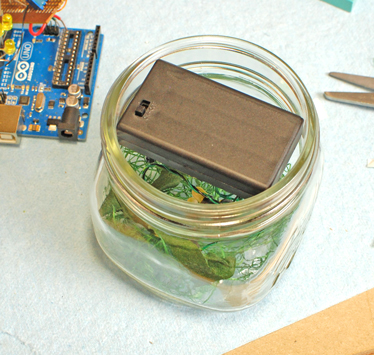
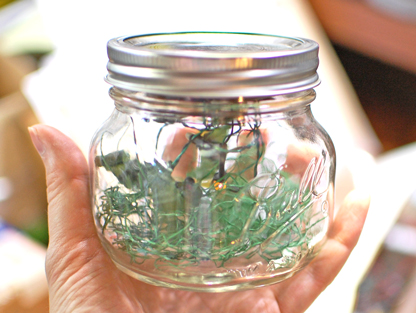
Fortunately and completely by happenstance the battery compartment fit snug in the throat of the jar, so I did not have to come up with a way of mounting it in there.  Some artifical grass placed in the jar and it was done.

Done!

Dim light, and the fireflies come out to do their dance of love. 
Yay!


Making Multiple Copies:
I made a few firefly jars to give away and did some tweaks, such as removing the trim pot and inserting added series resistors instead.  Here I show some details about assembly:

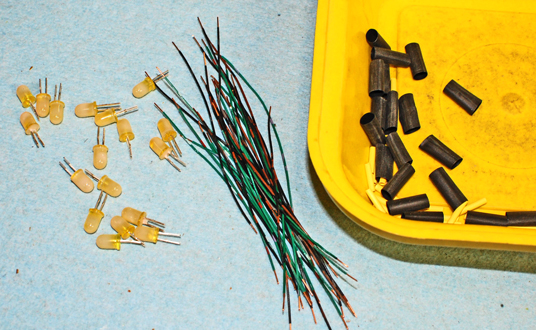
I dipped the LEDs in light pearl nail polish and let them dry overnight.  Here above I have snipped the LED leads, cut the shrink tubing, and cut and stripped the wire, which I actually recycled from 1980's era serial printer cables (great 24awg solid copper!).

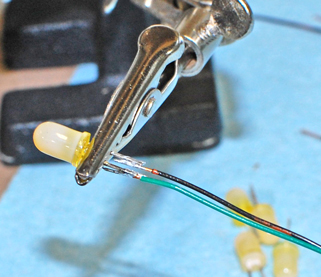
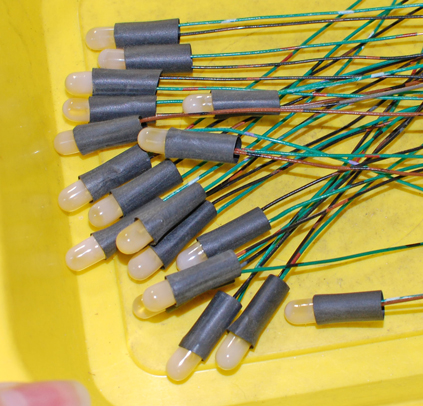
Here above I show the two layers of shrink tubing I used to insulate the leads, on the right I have not yet shrunk the outer sleeves.  

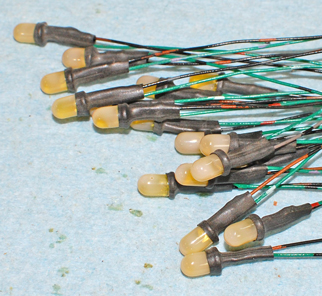
Finished firefly tails!


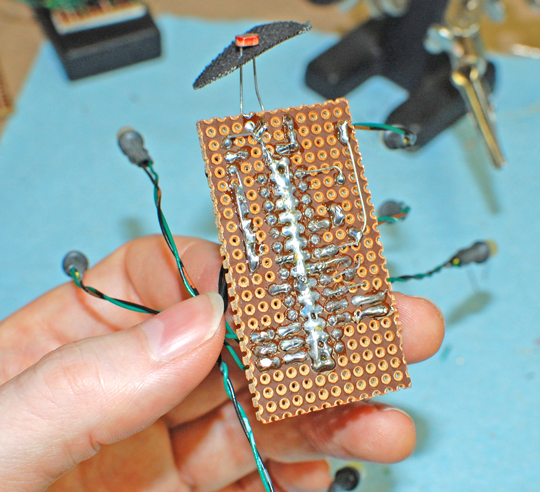
Here is the underside of a breadboard.  Note the ground plane under the chip and minimal use of solder to keep proper lead spacing.


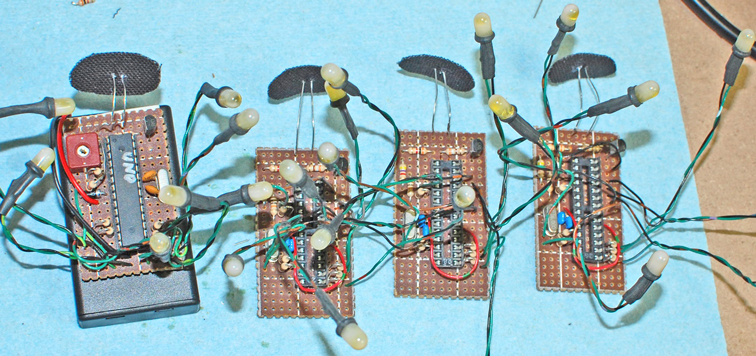
Multiplicity!  It must be Spring because the fireflies have reproduced!  
New boards completed and ready for fresh programmed ATmega328's.
More on burning Arduino bootloaders and making multiples of your microcontrollers in future posts.... stay tuned!


Frantone Home Page


Fran's Writings on Design and Engineering  ||  Fransworld Daily Updates


© 1994-2012 Frantone Electronics  All rights reserved.
All images and text are copyright Frantone Electronics.  No content of this website may be published or distributed without prior written permission from Frantone Electronics and any reproduction or manipulation of the content of this website for any purpose is strictly prohibited.